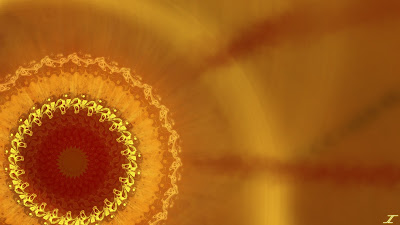
Posts

Showing posts with the label Inspiration

Ocean Spray

Image
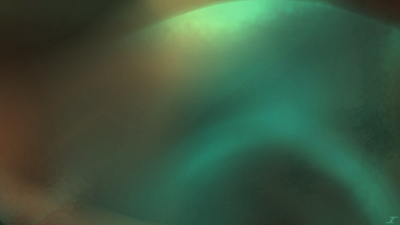
I’m back with another work, and I’ve been getting inspiration from album artworks on the colors to use since some of them just look nice. This one is no different than Somber Rage in that sense, since I used colors from an album artwork to start with, and by that I mean I used two colors and went from there. After some time, I got the end result called Ocean Spray. I again used colors of an album artwork that I like and have been wanting to use those colors for a while. Again I used the classic effects I typically use which are Gaussian Blur, Dents, and Radial Blur, but then I added a Motion Blur in there. I then also flattened the image, copied it, and added that to a new layer, and did Polar Inversion as well as Tile Reflection. The layer blend modes I used throughout are Additive, Lighten, Color Dodge, and Reflect. Additive and Lighten typically brighten the colors, while Color Dodge brings out some of the brighter sections of the image. Reflect then also dampens the image a bit, so...

Evening Horizon

Image
So I'm not sure entirely what I did with this image since I started it way back in June of 2021. Nor did I know what I was thinking, but I just left it as a work in progress until now. I was looking through my images that I have as works in progress, and decided I'd finish this one real quick. When completed, I saw that it looked like a sunset, a super pretty one when the clouds are in the right places in the sky, and the sun reflects just right. I knew then that I needed to title this one Evening Horizon. Based on what I know of the layer titles, I used Gaussian Blur, Dents, Radial Blur, and Zoom Blur to make the base of the image. After I was happy with the colors and positions of everything, I flattened the image, copied it, and pasted it on a few layers. I guess I didn't know what to do at that point, since I left it forever, and I re-did the flattening, copying, and pasting of the image. I then applied Radial Blur and Polar Inversion to some of the full layers as well ...

Grandma Rocket

Image
I'll be doing a bit of something different with this post. Since the picture previews are the first picture, I'll be posting the final product first, and then posting the process after. So I got a suggestion a few months back to make Grandma Rocket on Facebook Messenger, and so I decided I'd take to the challenge. It wouldn't have taken so long to make her, but with COVID and moving to a new apartment, it just got put on the back burner. Finally after weeks, I am pleased with the end result of Grandma Rocket. Also as promised on Facebook and Instagram, here is the process I took to create her. I first chose a picture that was sent to me by the user that suggested I make her, and made a super rough outline of her as seen below. Yeah, almost looks like a blob, but that alone took a solid 15 to 30 minutes to make. I then refined it as I went through again, and made the outline a bit better so you have what you see below. Honestly, nothing terribly different if you don'...

Mandalorian Helmet

Image
So I'm doing something completely different from what I usually do at this time of year. I just know that The Mandalorian usually comes out at this time of year, and so I decided to make this Mandalorian Helmet. I started out with looking up a picture on Google to see what I could try to base it off of, and I found this one. Once I got it down, I started making a super rough outline of the helmet. Once I got the rough outline done, I knew I could then do some minor adjustments, much like I did with Rocket and Big Jet. I flattened the rough outline, brought the opacity down a bit, and started pretty much from scratch to make the helmet again. Not long after, I got the outline you see below. Now we're getting somewhere! Now I just needed to color it, and shade it. I colored it by selecting the outside with the Magic Wand tool, and on a different layer, filling it with a light gray. I then proceeded to select different parts of the helmet with the Magic Wand, and applying gradien...

Big Jet from Little Einsteins

Image
Yet another image of a character from the show Little Einsteins. Thought this Thanksgiving week, that I would show my thankfulness by making these for my boys, who LOVE this show. After making Rocket, I thought, why not make the enemy of the show, who's name is Big Jet. I also made a coloring page of this, which can be found a while back on my Instagram page. Here is the finished image. Like Rocket, I started with an outline of Big Jet based on this picture , but was also going for making it more high def. I then filled in the color, and applied some of the shading after. For some reason this one wasn't as hard as Rocket, either because there are more straight lines, or because I knew more of what I was doing. Hope you enjoy this shorter post, and I'll see you here again soon. Happy Thanksgiving!

Rocket from Little Einsteins

Image
With Thanksgiving being less than a week away, it is a good time to reflect and think about what you are thankful for. I'm thankful for my family most of all, and something that they love is watching TV. One show in particular they love is the Disney show Little Einsteins. I decided I'd make Rocket from Little Einsteins, based on this image , as well as a version that is a coloring page sort of thing. On here though, I'll just showcase the fully colored and shaded version (the coloring page version is on Instagram). So without further ado, here is Rocket! I started out with the outline, making different layers for different sections so that I can make a crude outline, and refine it section by section as I went. I then colored in each piece on different layers, so that I can do further adjustments. I then made the darker lines on the hull, and extended the windows down a bit. I then worked on shading, and it took a long time to shade since there are many shapes and areas I w...

Dude Perfect Wallpaper

Image
First, may I just say that I hope that everyone is doing well with the COVID-19 pandemic. Please stay safe, and if you feel sick, stay home. Hopefully we can kick this pandemic in the butt before it takes more lives. I've actually had this image done for a while, and my main reason for making it is because they are awesome, and my kids really love their content. This is meant to be a dual monitor image, so I will have a download link toward the end of this post if you wish to use it. I actually had to do some hunting for a PNG transparent image of their logo, and then for the font for the other text. I then had a logo from them that had that green color, which allowed me to get busy. Here is the Dude Perfect dual monitor image. I have it split in two for the purposes of this blog, but it is initially a dual monitor, 4K image. It took a while to get it rendered on my little laptop, but it was well worth it. It was a simple image to make, had some Zoom Blur on the color com...

Desolation

Image
As they always say, new year new me, right? Well in this case it's true. It actually took a couple of days to get this image created, but I think it looks spectacular! Honestly this is one of the most complicated images I've made so far, with over 60 layers and the help of a metal tutorial found here . There was a process to the whole thing though, and it started as a completely different idea. Below is the concept of what I was going to be creating. I had the idea of making a metal circular structure which would be part of a machine, then put some lights on it and make it look old and worn. After having the idea in my head, I quickly drew up the concept art as shown above so that I can have some grounds on what I was going to do. I started working on the metal of the circular structure, which was made with the Clouds, Stitch, Motion Blur, Random Shape Fill, Relief, Color to Alpha, and Basic Adjustments effects. The layer blend modes used are Xor (which I've never use...

Smelling Roses

Image
When thinking of what to do next for an artwork, I thought long and hard and decided to give the color pink a try. I decided to pair it with white since the Energizer Bunny is pink and white. I started with two sections of pink and white, and got to work creating the image, not knowing what the outcome will be, but when the outcome was manifested to me, I felt satisfied. When I looked at it more, it reminded me of smelling roses when I was a kid at my home, hence the name Smelling Roses. I did the classic Radial Blur smoothness you see, but started with some frosted glass effects to smooth out the Dents before applying the Radial Blur effect. Not many more effects were used, I did a lot of layer work here more than anything, but I think the outcome was good. What do you think of when you see this image? Do you think of roses too, especially when you look at the swirls in the image? Let me know if you'd like, but I'll have something else up for you here regardless. Enjoy!

From Bad, to Amazing

Image
The title is something that I haven't really done here, which is a title that isn't the title of the image at all. Don't worry, I'll go on to my old ways here in the next post, unless you guys like the interesting titles. We shall see what happens. So I was thinking of what to do for a new image, and I thought, why not resurrect my very first image that I made on Paint.NET, which I called Divided. Now, this image is the worst image I have on here, at least one of my worst, since it was when I first started and didn't know what I was doing. I have since gotten better as you can see, and am wanting to show what I can do. Anyhow, I wanted to do something with this image so that I can compare them side by side, and show myself how far I've come in 9 years or so. To give you perspective, here is my first image called Divided. Not the best, lots of dark areas, and not many effects. I was a senior in High School since it was created back in September of 2009. So...

Thanksgiving Spirit

Image
First and foremost, Happy Thanksgiving everyone!! I hope you have enjoyed it so far and have a wonderful thanksgiving dinner planned for later. So, I've been playing around with a few new plugins as mentioned last month, and I decided to give them a whirl with my new style. Not sure how I like it since it is combining my old style with my new style, but we'll see how it goes. This is called Thanksgiving Spirit and I used a Thanksgiving color pallet that I found here . Lots of Radial Extruder, Radial Blur, Zoom Blur and Dents in this image. I tried making it brighter, but I also didn't want to modify the colors in any way, so I left it how it was. I did a bit of layer adjustment too so that the colors would stay the same in the intricate design in the bottom left-hand corner. I hope you have enjoyed your day and I hope we can keep the spirit of Thanksgiving with us all year round. See you in another post here soon.

Rising Phoenix

Image
As the name suggests, a warm color pallet is in this one. Since school has started and cooler weather is coming upon us, just thought I would make a brighter image. I also noticed that most of my images don’t feature orange. So I thought that I would look online for good colors that go with orange, and blue was one of them. Not blue again!! Don’t worry, I hope that this image will be a bit of a change for the better. So I took a slightly different approach to this one than I usually do. I started with some random shapes that I drew with blue, and then with orange and distorted the crap out of them. I then tried different blending effects and when that wasn’t working to my liking, I flattened the image with the layers that I wanted and blended the layers using different effects. Here is the image. Upon further examination, and just thinking of how this could have an emotional connection to school having started, the blue could be something like the calmness of the first wee...

New Pictures!!!

Image
I finally got around to making some new pictures!!! All I will really say is that I was inspired by Google Search on the first 3, the next two are just random and a bit of color changing, and the last two are done from tutorials online!! Here they go! Google Search Inspiration  Energized Blue Mystic Light Heat Tunnel Random Unknown Midnight Tutorials Mountain Panels Tutorial provided my barbieq on the Paint.NET forum. Galaxy Green Tutorial provided by Celestrial on the Paint.NET forum. I know, this was a huge update!!!! I've been busy this week making picture after picture after picture!!! I may have exhausted all of my ideas for now, haha. I hope you like this update!!!